I'm back to journaling.
It took a while. I know.
I'll be finishing up my
31 Days of Scripture Art Journaling...
finally. I just wanted to say thank you.
Thank you for patience and kindness and
emails and groups of you making together,
or making alone in the wee hours of the night.
Thank you for taking a chance
and stepping outside of what is comfortable and known
and risking just a little in order to let God's word speak to you
and encourage to you and sink deep down into your heart
so that HE can work out your salvation in you, with you
with fear and trembling.
okay, I'll stop.
please just know that I'm humbled and
a little amazed that I get to do this.
Day 20: Creating Photo Transfers in Your Journal
This is a really cool technique.
And very easy. I've seen it and I've wanted to try it for so long.
It's super simple, so I don't know what took me so long,
but here's what you'll need:
Materials:
Thick Journal Pages
Gesso
Acrylic Paint
Pretty Paper
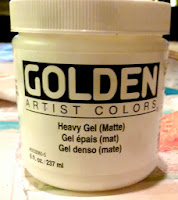
Gel Medium
(Mine is heavy, but it doesn't matter.
It can be light, medium, or heavy)
Yes, it has to be from an ink jet printer. Go to Kinkos and make
a color copy of the image you want to transfer.
Please note: The image in your journal
will be the reverse image of your copy,
so if you have text, you need to turn it around on your
computer first, then print it out, then copy it.
Sponge
Water
White Ink
It looks like this:
You can find it at the craft store on the aisle
with all of the calligraphy pens.
1. First, prep your journal page with 2-3 colors of acrylic paint.
Apply with a dry paper towel. As shown here.
2.Use patterned paper to collage your journal pages.
Use big pieces to fill up the background.
(You'll be amazed at how easy this is.)
Get your ink jet copies ready.
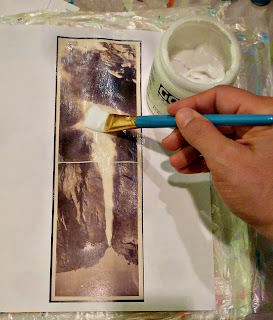
Cover the copy with gel medium.
Place the copy face down on your journal page
in your lovely pajamas.
Press down all around to get the air bubbles out and
to make sure that it all adheres to the page.
Wait 24 hours.
Take a damp sponge and wipe it over the paper
several times until the paper starts balling up
and coming off. Continue to wipe until all
of the paper residue comes off.
Voila!
Be careful not to scrub too hard or the transfer
will come off. As seen here.
4. Add spots of color with your fingers.
5. Add words details.
Here's the secret: calligraphy ink.
I love to write/paint with this ink with it because it's
nice and thin, but super opaque & pigmented.


SO COOL>>>>THX for sharing!
ReplyDeleteAwesome!thank you!
ReplyDeleteCan't wait to try this, thanks for the great tutorial!
ReplyDeleteThanks for sharing your process! Do you use the ink with a paint brush?
ReplyDeleteWonderful. Thank you for sharing! Lighting For Artwork
ReplyDelete